

von Fredrik Billig, Stockholm Schweden Original öffnen
Welcome to my Marblehead-project site.
Here i will share my experience of building a Marblehead from a drawing by Graham Bantock.
It's the second Marblehead i build on my own. The first one was a Wafer built in 1994.
All the rigs and radio equipment was ok, so i only needed a new hull to get up to date with the faster boats.{mosimage}
The drawing and the plug.
I ordered the drawing from Sails Etc in the middle of februari and recieved it about a week later.
It cost me 15 GBP. It's a two part drawing with full scale details of almost everything, down to how to a detailed description of how to make make your own booms and even sails.
Since i already got a quite competitive Marblehead i'm only interested in the hull and will keep my rigs and fin from that boat. More about my current boat later.
Sails Etc describes the Monarch with these words:
"A close sister to ROK and PRIME NUMBER. A new Marine Modelling plan with a good deal of construction information. Needs to be built light for best performance. SAILSetc foils, fin box/mast tube, and deck mouldings can be used to complete a planked hull. Build it with the raised foredeck if you plan to use shroudless conventional rigs or with a flat deck if you plan to use swing rigs only".
 My rigs are a mix of conventional Walicki rigs and swing rigs from Sails Etc so i will use a fin box cut for the Astra (i bought the Astra drawing and fin box last year, but never had the time to build the boat).
You can build it with a planked hull as Sails Etc descibes it, but i prefer moulding it in epoxy and carbon fiber. I built my current boat that way, but i didn't make the plug that time.
So, that's going to be a first for me, for a Marblehead atleast. This is probably the tenth model boat i will build.
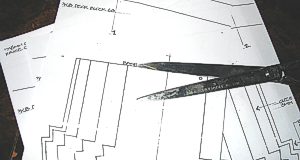
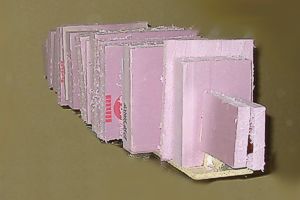
 After photocopying the drawing i cut out all the sections and glued them on wood-chipboard and carefully used a saw and a file to make the sections as much like the drawing as possible.......
Now, there are atleast two different ways of completing the plug. Either you make a planked "hull" and mould the boat around that. Or you can put plastic foam between the sections and shape it as good as possible, then mould it with fibreglass cloth and use filler and sandpaper to make a nice finish, then mould the boat around that. I have never built a planked hull so i went for the second choice, wich i believe is also quicker. Not so sofisticated since you probably will need some amount of filler.
But, the plug will never sail, it's just the shape and finish that has to be right.
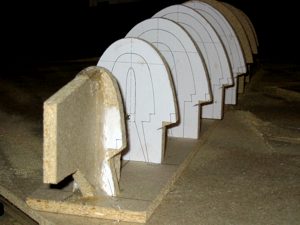
 From left to right in about one hour.
I used a saw, a rasp, sandpaper and my eyes to get it right. If it isn't right, well, filler in large quantities will come later...
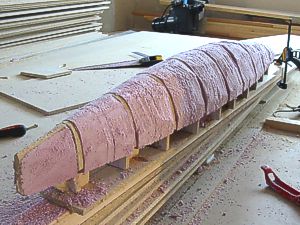 To make a stable platform for the plug i screwed it on a plank about one meter longer than the boat. In the picture to the right you can see the whole thing being held down by a clamp.
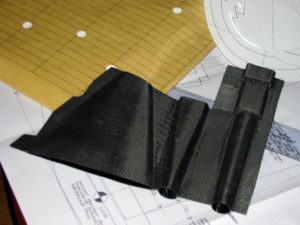
Next step was to cover my plasticfoam and chipboard Marblehead with three layers of 300gr fibreglass cloth and epoxy.
The plastic foam i used will melt if exposed to the much cheaper polyester-plastic or usual plastic padding filler. So epoxy was the only alternative.
There are plastic foam types that's suited for polyester. But they are so much more expensive than this type made for isolation that the cheaper polyester doesn't make up for it.
undefined

