

More on the hull and moulding the deck
 After sanding and some more sanding on the outside of the hull (still on the plug) i varnished it with my floor-varnish to get a nice and shiny finish. Then it was time for some kevlar-reinforcements and putting the finbox, ruddertube and mountings for the rudderservo in place.
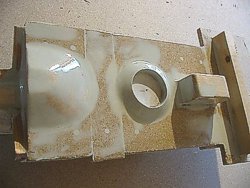
The reinforcements is made from 60gr kevlar cloth and as you can se from these pictures theye are located round the flange, at the waterline and round the finbox area. Not very complicated to put them there using epoxy. Just make sure you have sanded away all the wax and release agent from the plug. I use acetone to clean it after sanding.
The finbox is glued in place using epoxy and filleting blend (some kind of fibers with a natural wood color, leftover from my wooden boat days) to get the right consistency on the epoxy. On the picture to the right (disregard the white thing on top, it's a balsa stick there to keep the hull at the right beam) i haven't glued it in place "permanently" to make it possible to remove if i didn't get it completely right. Fortunatly i did so next step was to mix epoxy, filleting blend and black color pigment to get a black mix and make a rounded joint round the whole finbox. To get it round and smooth i use the stick from an ice cream (well in Sweden they have rounded ends..)
The best trick to get the finbox in exactly the right position is probably not to just take a measurment from the drawing and then use eyesight to get it aligned. But that's how i did it and it worked for me...
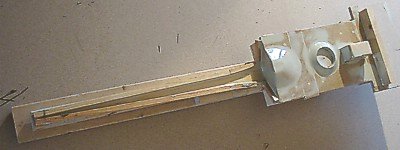
 The yellow lines coming out from the bottom is kevlar threads glued on the flange at the position of the eyebolts for the shrouds on the c and c2 rigs, to get a stiffer boat. I have seen boats with rigging screws in that position, and that should work too. My old boat is very stiff with this kevlar-variant.
The rear deck and the stern is made from pieces of epoxy and carbonfiber laminated (2-3 layers) on a piece of thick windowglass (well probably not made for windows since it's about 5mm thick, but you get it..) and cut with a normal pair of scissors to the right size. By laminating on glass you get a perfect finish on one side.
The ruddertube is carbon tube and the white bearing is ptfe, both from Sails Etc. The rubbertube goes right through the hull and is glued with my black epoxy mix. Then the ruddertube is cut to make a neat finish along the hull.
The mountings for the rudderservo is a beam cut in half. I made it for my first boat but never used it and it was good to have it lying around almost ten years later. 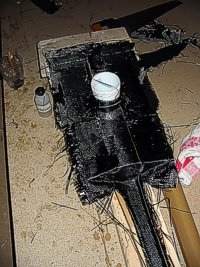
The deck
To get a strong but light deck i wanted to make it in one piece. I made a deck "plug", or rather a mould since the visible side would be the smooth one. The deck mould contains the mastrecess, radiopot recess and a mounting for the rudderservo. But as you have seen i choosed not to use it. It wasn't stiff enough and weighed far more than the solution you have seen above.
The deck plug was made out of wood (some of it balsa), chipboad and plastic padding. coated with floor varnish, waxed and coated with release agent. Ready for moulding..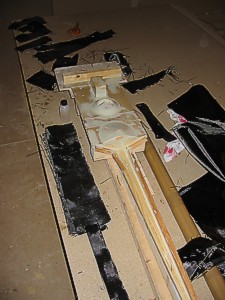
{mosimage}All carbon fiber that was going to be used cut up before moulding the deck. The small bottle to the left is the release agent. I didn't use any glass cloth for the deck since the surface would be smooth anyway.
Another messy moulding is finished...
Most of the deck is 2 layers of cloth but at some points it's three layers.
Just as with the hull i did this twice. The first moulding had too little carbon at some places and cavities in where i had use too little epoxy.
But the second try is usually better so i did it again. This time i suspect i used just too little hardener so the mould wouldn't cure as quickly as i wished it to. Had to be patient and use some heat to help it.
A couple of days later it was cured enough and i decided to use it, and not do it again...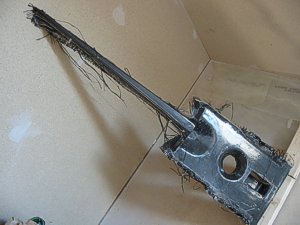
The raw deck moulding right of the mould. Just some cutting and sanding and filling and sanding before it can be fitted to the hull.

